Making wallpaper work
Everything old is new again, and that includes home DIY projects. The latest one to make a comeback? Wallpapering!
No longer just a daggy pastime, wallpapering is enjoying a resurgence. It adds personality and quirkiness and is a quick way to liven up a space. It’s also a great way to show off your taste and style, as today’s wallpaper comes in hundreds of patterns and colours.
Wallpapering often ends up – wrongly – in the too-hard basket, as homeowners believe it to be too tricky to take on themselves. But armed with a bit of know-how, you can makeover your room with relative ease – and top it off with the pride of knowing you did it yourself!
CHOOSE YOUR PRINT
Before you get started, think about the look you are trying to create and have a look for the wallpaper that might make it happen. Pinterest is always a good place to start, and once you start looking you’ll find that many local homewares and hardware stores stock a good supply of wallpaper. Apart from colour and pattern, many types of wallpaper are embossed, adding texture to your walls too. The material that the paper is made from is also important – in wet areas like kitchens, opt for vinyl – but for hallways and bedrooms, paper or fabric will work just fine.
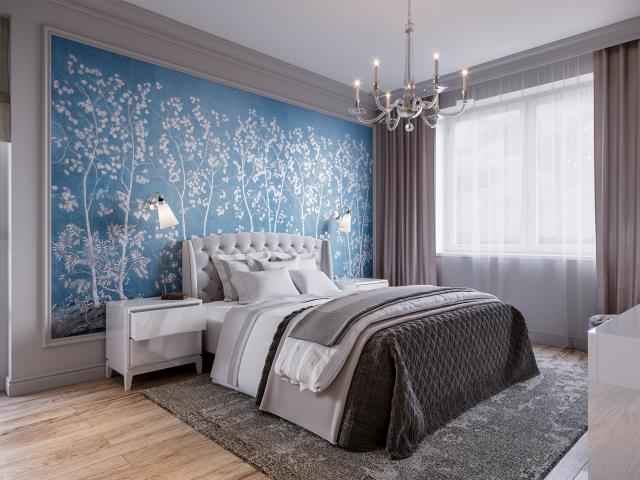
These days, when it comes to wallpaper the only limit is your imagination. For example, you don’t necessarily have to paper the entire wall – if that’s too much for you, why not try creating a focal point for the room with a framed section of wallpaper? Go for something bold and bright to draw the eye, and use it as the feature of that particular space – it’s a guaranteed conversation starter!
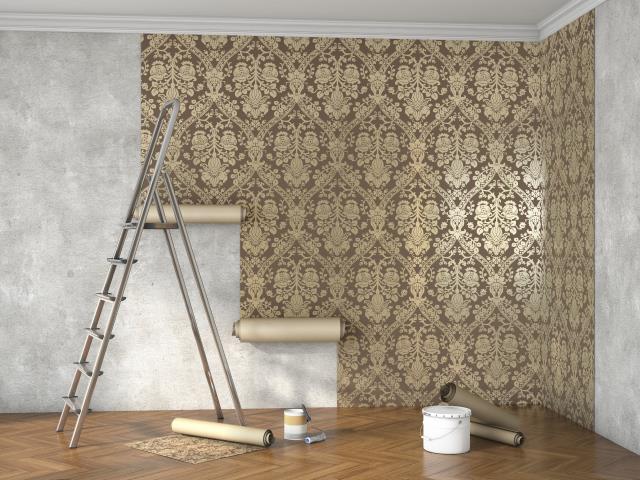
GET PAPERING
There are plenty of specific tutorials online; however there are a few key things to keep in mind when you get stuck in. Firstly, the wallpaper you choose will provide instructions as to what adhesive to use. It’s important to use the right one so that your wallpaper sticks to the surface correctly. Measure the space to work out how much you’ll need, but always order an extra two or four rolls – accidents happen! Additionally, it’s vital to start with a smooth wall, so break out the sandpaper and get scrubbing. And when you get to the end, don’t panic if you see bubbles – there are ways to fix them and get a nice smooth finish without having to tear the whole thing down.
NOT JUST FOR WALLS
It might sound strange given the name, but wallpaper isn’t just for walls anymore. Nowadays, designers are experimenting with papering all kinds of surfaces, like kitchen appliances, to add interest or, conversely, to hide that bland metal cover and help it better blend with the aesthetic of the room. If you’re into restoration, or just trying to bring new life to that tired old desk or chest of drawers, wallpaper just might be the answer. Many a plain wooden furniture item has taken on new purpose after being decorated with strips of colours and patterns. This style of wallpapering often works well with the shabby chic style – but don’t be afraid to branch out and do it your way!